In this article, we will discuss “How to Add a New Key-Pair to an AWS EC2 Instance for SSH”. After creating an AWS EC2 instance, you might want to setup multiple SSH accounts for each user. Then you have to create new Key-Pairs, when you think that the user doesn’t need to connect via SSH into AWS instances, you can delete the key pairs directly from the AWS EC2 Instance Console.
You have to check my previous article for a better understanding of SSH connectivity.
Table of Contents
Create Key Pair
Login to your AWS Management Console, then go to EC2 Management Console. After that go to “Network & Security” in the navigation pane and click on the “Key Pairs”.
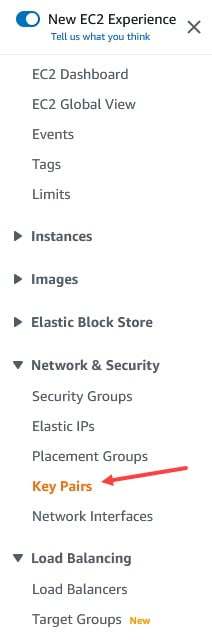
Here, you can find the existing key pairs and you can search any key pair using the search field via key pair name. For new key pair, click on the “Create key pair” button.

Now, you are redirected to the “Create key pair” form. Here, add the key name, Keypair type, and the Private key file format.
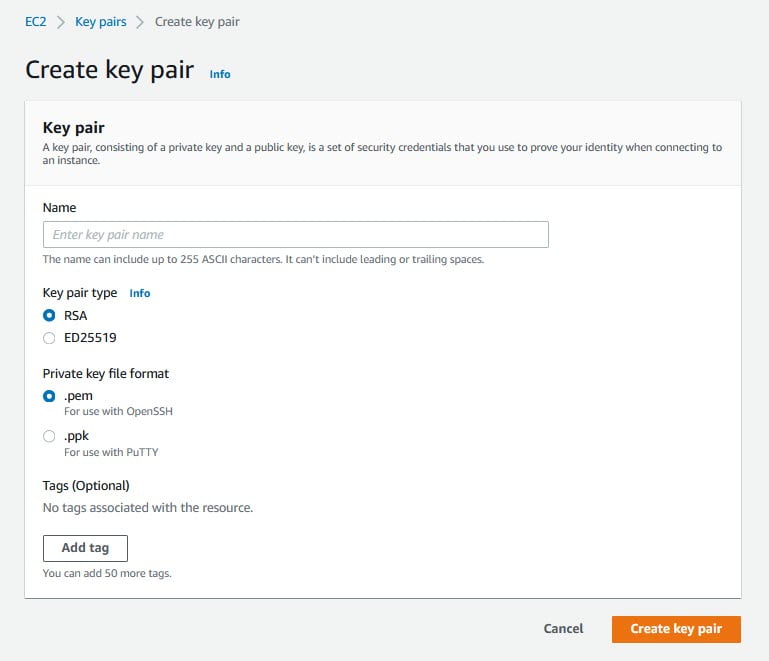
There are two types of Key Pairs.
- RSA: This is the most commonly used key pair type.
- ED25519: It’s having some limitations, You can use ED25519 keys with Linux and Mac instances only.
There are two types of Private key file formats.
- “.pem”: Select .pem as the private key format if you need to use a key in Linux with OpenSSH.
- “.ppk”: Select .ppk if you need to use the key in Windows with PuTTY.
We will create both “.pem” and “.ppk” for this tutorial.

Both keys are created successfully and downloaded to the system.
Let Connect to EC2 Instance
We have generated a new key pair in the web interface of AWS Management Console. Now, we need to create a public key by using the downloaded “.pem” file.
I’m using the “ssh-keygen” command in the Linux terminal to create a public key.
ssh-keygen -y -f path-to-key-pair-pem-file.pem
In this demo, I’m at the root of the directory where the “.pem” file is located.
ssh-keygen -y -f cb_temp_pem.pem
If you face an error related to the permissions then use the following command to set the required permissions. And, try again the “ssh-keygen”.
chmod 400 cb_temp_pem.pem

A public key is ready, just copy the generated key string and save this information in a safe place. Let’s connect to the AWS EC2 Instance via SSH as explained in the previous article or directly connect to SSH via terminal/putty with the default public key.
Open the configuration file where we have to add the newly generated key string, can be located in the following paths. It might be different for you as per your user name.
/home/ubuntu/.ssh/authorized_keys
/home/ec2-user/.ssh/authorized_keys
/root/.ssh/authorized_keys
You can edit the configuration file using the “vim authorized_keys” command on the terminal. Paste your public key from the clipboard to the second line in this configuration file. Save the changes and close the file. Don’t close the current SSH session that you use for connection to the EC2 instance until you ensure that the second key you have added in the configuration works successfully. Otherwise, you can lose your SSH connection if the configuration is incorrect. This will affect the ability to connect to AWS instances via SSH, so be careful to perform this action. Open another terminal on your local Linux machine and try to connect to the instance by using a new “.pem” file.
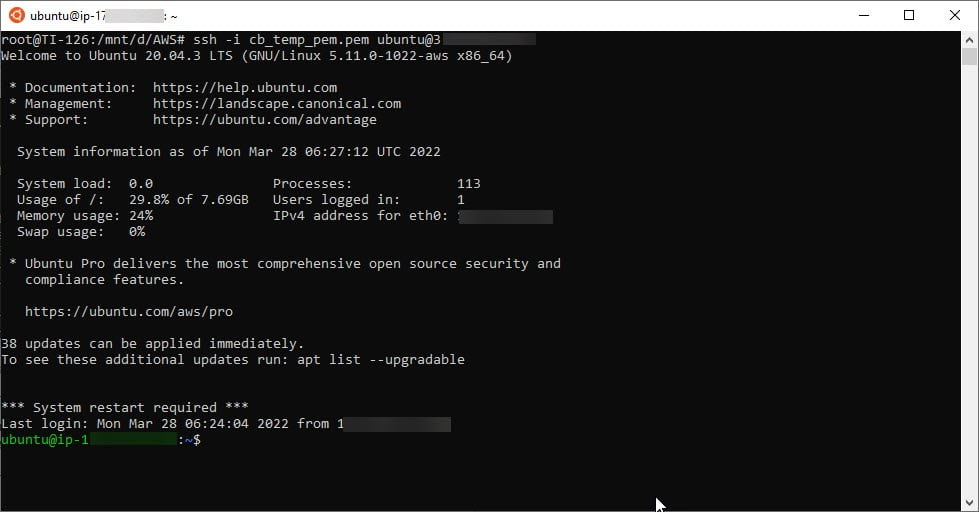
Great! It’s working fine, the AWS SSH connection has been established successfully. Our newly created “.pem” file working fine now, you can send this key (cb_temp_pem.pem) to a user who needs to establish the AWS SSH connection.
Disable SSH Access
When you will need to disable SSH access for any of the users, you have the follow the given solution:
Delete the SSH public key from “.ssh/authorized_keys” on your remote Linux instance running in AWS EC2. Make sure any mistake done in this step will create more complexity. For example, our configuration file contains two SSH keys. The first key was generated when you created the EC2 instance and the second key you created before for another user to connect to AWS EC2. After the deletion of the key, you can close the SSH terminal windows.
If you delete a key pair in “Network & Security -> Key pairs” from the EC2 Management Console, keys inside the particular EC2 instance are not deleted. So I recommend deleting both Key pairs and the SSH public key.
Conclusion
In this article, we are discussing “How to Add a New Key Pair to an AWS EC2 Instance for SSH?”. Hope you like this article, and learn how to create new key pairs for SSH. Please feel free to add comments if any queries or feedback.
Keep learning & stay safe 🙂
You may like:
How to Setup an EC2 Instance on AWS?
How to Manage Elastic IP in AWS?
Basic Understanding on AWS Lambda
How to Manage AWS Lambda Versioning and Aliases
If you like our content, please consider buying us a coffee.
Thank you for your support!
Buy Me a Coffee