
In this article, we will discuss “How to Use SSH with AWS EC2 Instance?”. As I already explain the setup of EC2 Instance and the use of an Elastic IP in my previous article. Today, we will learn how to connect an EC2 instance using SSH. If still, you have not read my previous articles then I recommend checking them once for a better understanding.
Table of Contents
Prerequisites
- A running EC2 Instance.
- Elastic IP (Optional for this article)
- “.pem” file, which is downloaded when setup the EC2 Instance. If not having the “.pem” file, then you have to create new key/value pairs.
Connect via Terminal or WSL(Window Subsystem for Linux)
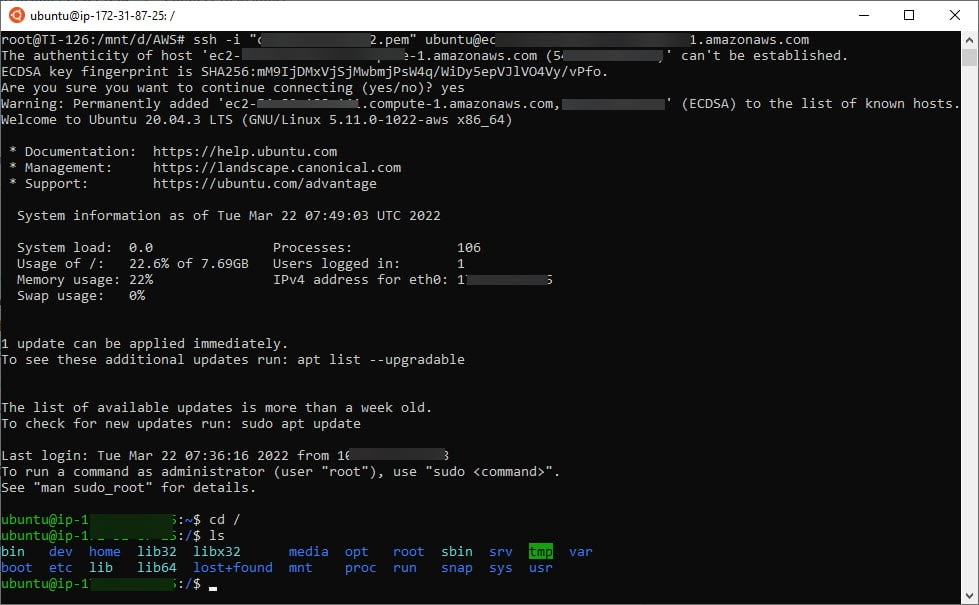
Open your terminal and go to the directory where you downloaded your “.pem” file. Use the following command to connect with the server.
ssh -i "****.pem" username@<publicDNS> or <IP Address>
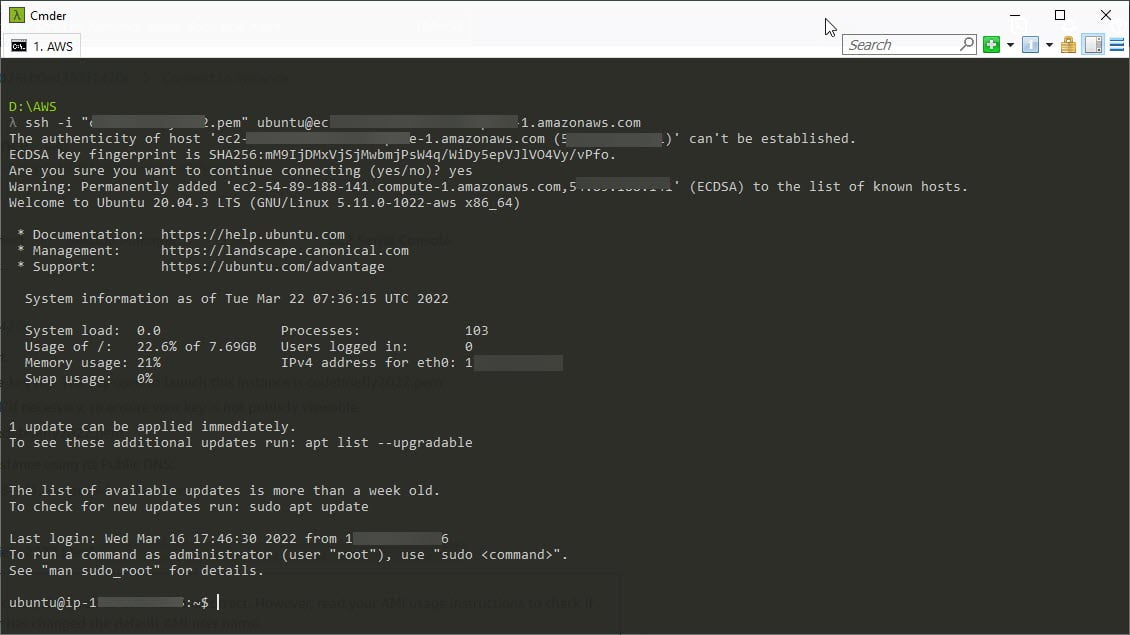
The same terminal command can be used in the windows Linux terminal. I’m using ubuntu on my windows machine. You can check the given screenshot.
SSH Command Explanation
- ssh: Command to use SSH protocol
- -i: Flag that specifies an alternate identification file to use for public-key authentication.
- username: Username that uses your instance
- IP-address: IP address is given to your instance
- public DNS: Public DNS of the EC2 Instance
Connect via Putty (Windows only)
Need to install putty on your Windows machine. Then open “PuttyGen” (it is included with your Putty Client installation) on your PC.
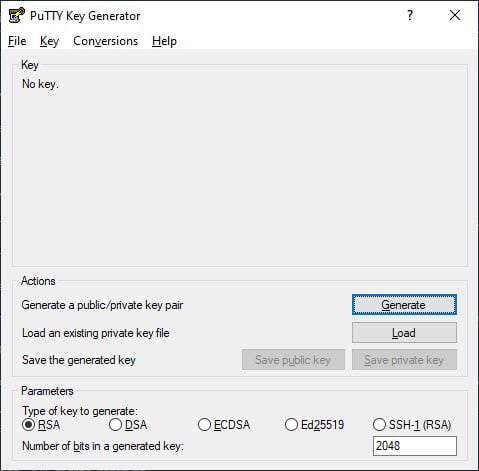
Make sure the checkbox “RSA” is selected. After that click the load button and go to the folder where you have stored your “.pem” file, select it and choose open.
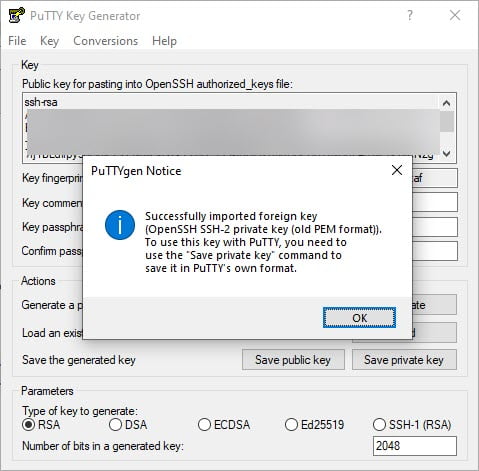
A popup appears when successfully loading the “.pem” file. Click on the save private key button. Then a message will prompt, click on the yes.

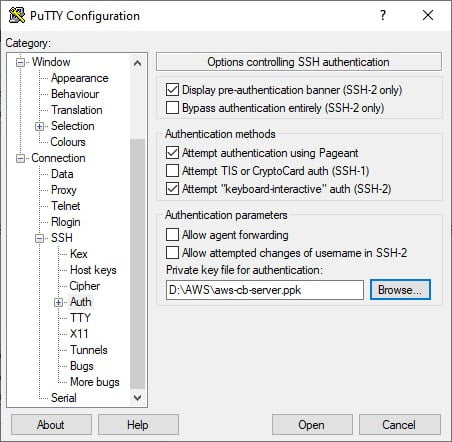
Now save the “.ppk” key with a unique name. After that close the PuttyGen program and open Putty. Go to the SSH section and expand the section. Now select the Auth section and select the “.ppk” file that we just created.
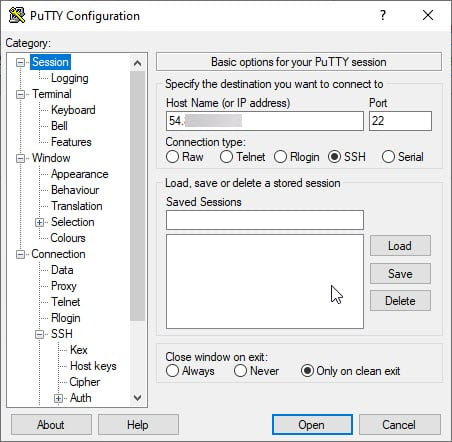
Go back to the top of the menu and selects the Session section. Fill the field Hostname (Host/IP address) with the IP address given to your AWS EC2 instance and click open.
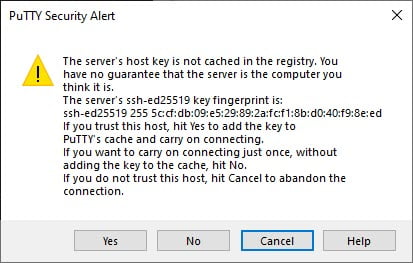
A warning message will prompt. The server host is not registered on our PC, so we must add it. Click yes.
A window will prompt asking for the username, type your username for ssh access, by default its ubuntu.
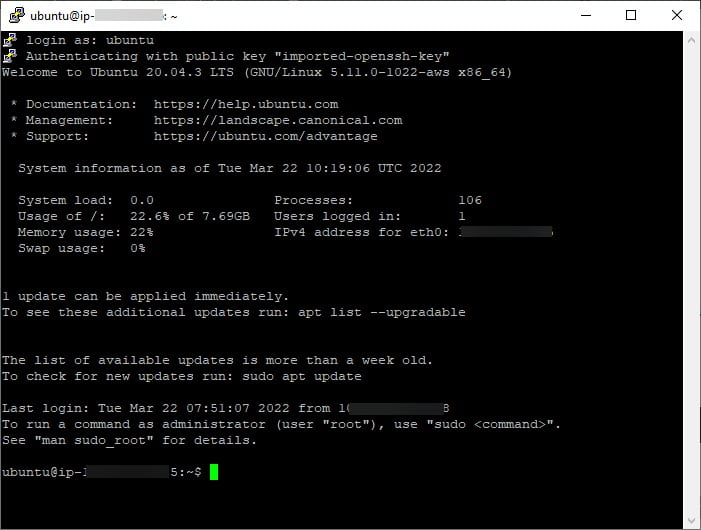
Now we are connected to our AWS instance using Putty.
Conclusion
In this article, we are discussing “How to Use SSH with AWS EC2 Instance?”. As you see, the steps are simple and easy. Hope you like this article, please feel free to add comments if any queries or also send me your feedback.
Keep learning and stay safe 😉
You may like:
Basic Understanding on AWS Lambda
How to Manage AWS Lambda Versioning and Aliases
Laravel Sanctum – Restful API Authentication
If you like our content, please consider buying us a coffee.
Thank you for your support!
Buy Me a Coffee