In this article, we will discuss the Laravel 5.6 API Authentication Passport. Laravel provides an easy way to perform authentication and API’s use tokens to authenticate the user. Because API’s not maintains any session between request.
In Laravel, API authentication is too easy using Laravel Passport. It provides full OAuth2 server implementation for your Laravel application. Passport is built on top of the League OAuth2 server.
I’m assuming you are familiar with the Laravel framework if not then you can start with given tutorials.
- Laravel Setup
- Laravel Default Authentication Setup
- Custom User Email Verification / Activation
- Understanding Laravel Middleware
- All You Need to Know Laravel Routing
- Setup Virtual Host with Xampp Server
Table of Contents
Installation Laravel Passport
Use given composer command to install Laravel Passport.
composer require laravel/passport
After, successful execution of the above command. Update your config/app.php.
'providers' =>[
    ...
    Laravel\Passport\PassportServiceProvider::class,
    ...
],
The Passport package having its own database migration directory with the framework, so we need to migrate our database after registering the provider.
php artisan migrate
After, executing the above command. If you receive an error “Syntax error or access violation: 1071 Specified key was too long; max key length is 767 bytes (SQL: alter table `users` add unique `users_email_unique`(`email`))” Then you can fix this using given solution.
Update the AppServiceProvider.php located at app/providers.
use Illuminate\Support\Facades\Schema;
public function boot()
{
Schema::defaultStringLength(191);
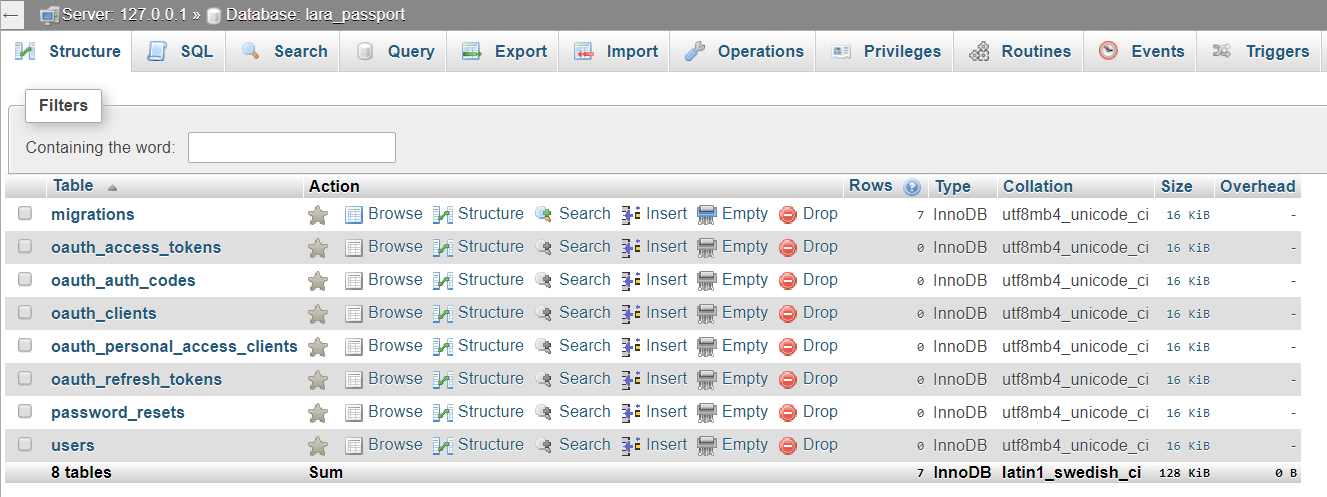
}After, updating the AppServiceProvider.php. The migrate command executed without any issue. And create some of the tables related to the OAuth2 Server and some of Laravel default authentication.
Installing Encryption Keys and Update User Model
Next, we need to create the encryption keys. Those keys are required to generate the secure access token. The given command will create “personal access” and “password grant” clients which will be used to generate access tokens:
php artisan passport:install
After, creating the encryption keys. It’s time to update our User Model. Add Laravel\Passport\HasApiTokens trait to App\User Model. This will provide some of the helper functions to your model. After an update, that allows us to inspect the authenticated user tokens.
<?php

use Laravel\Passport\HasApiTokens;

class User extends Authenticatable
{
    use HasApiTokens, Notifiable;
}
Register Passport Route
Next, we will update AuthServiceProvider.php located in app/Providers directory.
use Laravel\Passport\Passport;

class AuthServiceProvider extends ServiceProvider
{
    ...
    public function boot()
    {
        ...
        Passport::routes();
    }
}
Update Auth Configuration
Now time update our config/auth.php located in the config directory. Open the file and update the driver option of the API authentication guard to Passport.
'guards' => [
    'web' => [
        'driver' => 'session',
        'provider' => 'users',
    ],

    'api' => [
        'driver' => 'passport',
        'provider' => 'users',
    ],
],
Setup Token Lifetimes
By default, Passport tokens having a long life and expire after one year. But if you want to change this lifetime, then you can easily update this using tokenExpireIn and refreshTokenExpireIn methods. You need to update your AuthServiceProvider, boot method:
public function boot()
{
    $this->registerPolicies();

    Passport::routes();

    Passport::tokensExpireIn(now()->addDays(15));

    Passport::refreshTokensExpireIn(now()->addDays(30));
}
Creating API
After, all the basic setup of Laravel Password. Now time to create API’s for Login, Register and User Details.
API Route
Register route for Login, Register, and User Details.
<?php

use Illuminate\Http\Request;

Route::post('login', 'API\AuthController@login');
Route::post('register', 'API\AuthController@register');

Route::middleware('auth:api')->group(function(){
  Route::post('details', 'API\AuthController@getDetails');
});
Create Auth Controller
Use given command to create Auth Controller, Here we create functions to perform Login, Register, and Fetch User Details.
<?php

namespace App\Http\Controllers\API;

use Illuminate\Http\Request;
use App\Http\Controllers\Controller;
use Illuminate\Support\Facades\Auth;
use App\User;
use Validator;

class AuthController extends Controller
{
  /**
   * Login API
   *
   * @return \Illuminate\Http\Response
   */
  public function login(Request $request){
    if(Auth::attempt(['email' => $request->email, 'password' => $request->password])){
      $user = Auth::user();
      $success['token'] =  $user->createToken('LaraPassport')->accessToken;
      return response()->json([
        'status' => 'success',
        'data' => $success
      ]);
    } else {
      return response()->json([
        'status' => 'error',
        'data' => 'Unauthorized Access'
      ]);
    }
  }

  /**
   * Register API
   *
   * @return \Illuminate\Http\Response
   */
  public function register(Request $request)
  {
    $validator = Validator::make($request->all(), [
      'name' => 'required',
      'email' => 'required|email',
      'password' => 'required',
      'c_password' => 'required|same:password',
    ]);
    if ($validator->fails()) {
      return response()->json(['error'=>$validator->errors()]);
    }
    $postArray = $request->all();
    $postArray['password'] = bcrypt($postArray['password']);
    $user = User::create($postArray);
    $success['token'] =  $user->createToken('LaraPassport')->accessToken;
    $success['name'] =  $user->name;
    return response()->json([
      'status' => 'success',
      'data' => $success,
    ]);
  }

  /**
   * details api
   *
   * @return \Illuminate\Http\Response
   */
  public function getDetails()
  {
    $user = Auth::user();
    return response()->json(['success' => $user]);
  }
}
Finally, now time to test our API’s. I’m going use Postman to test the API’s. A postman is a great tool for API testing. You can use another tool as per your compatibility and experience. Also, share the tools with us using the comment section. You can download a postman here.
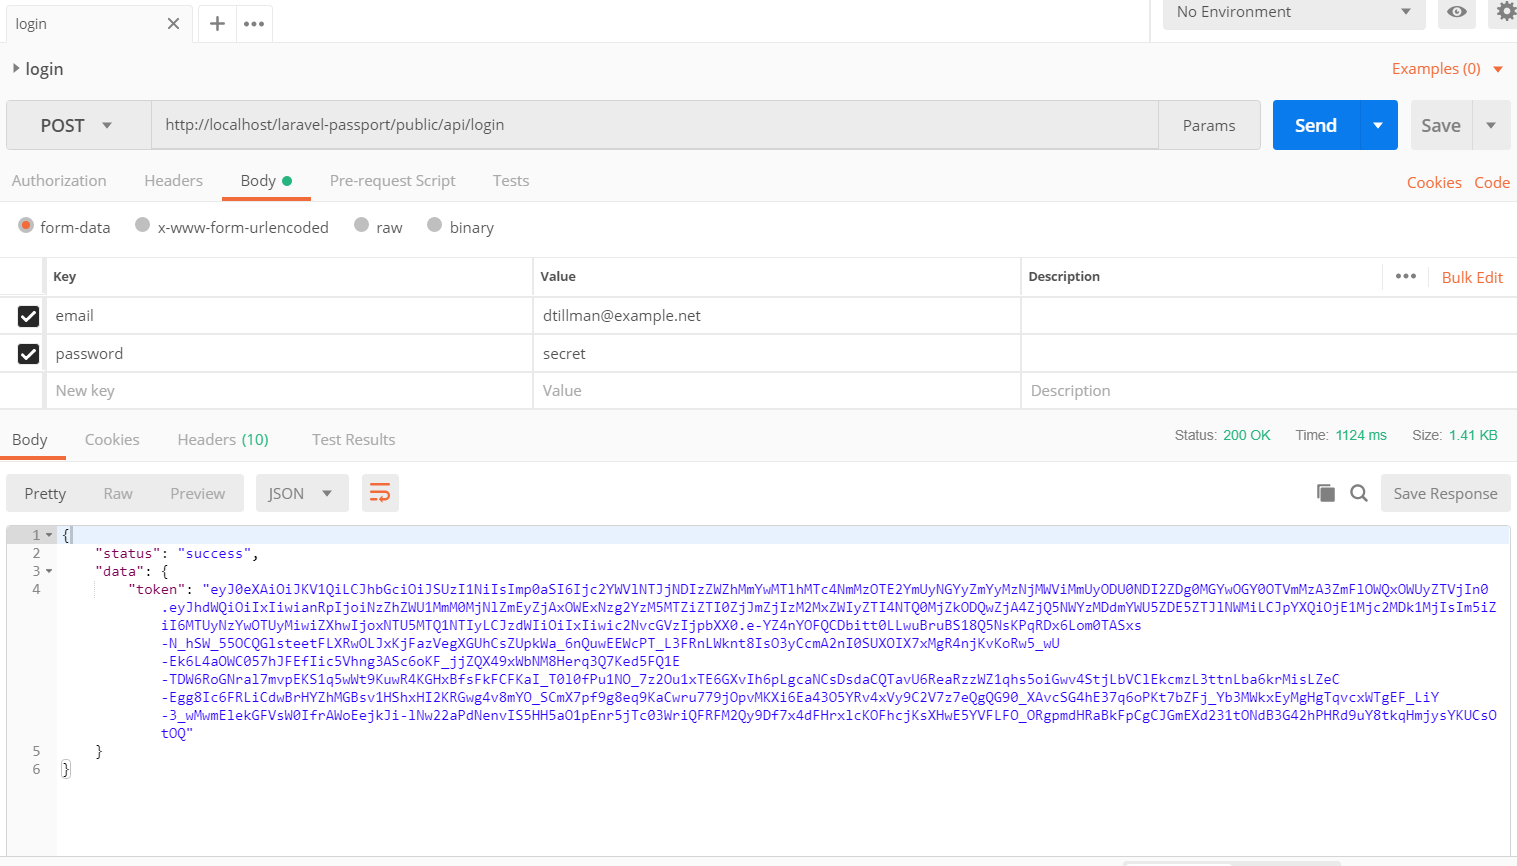
Test Login API
Login API needs user email and password. After successful authentication API returns a token which is used in further API calls. Or if authentication failed, then error thrown by the API.
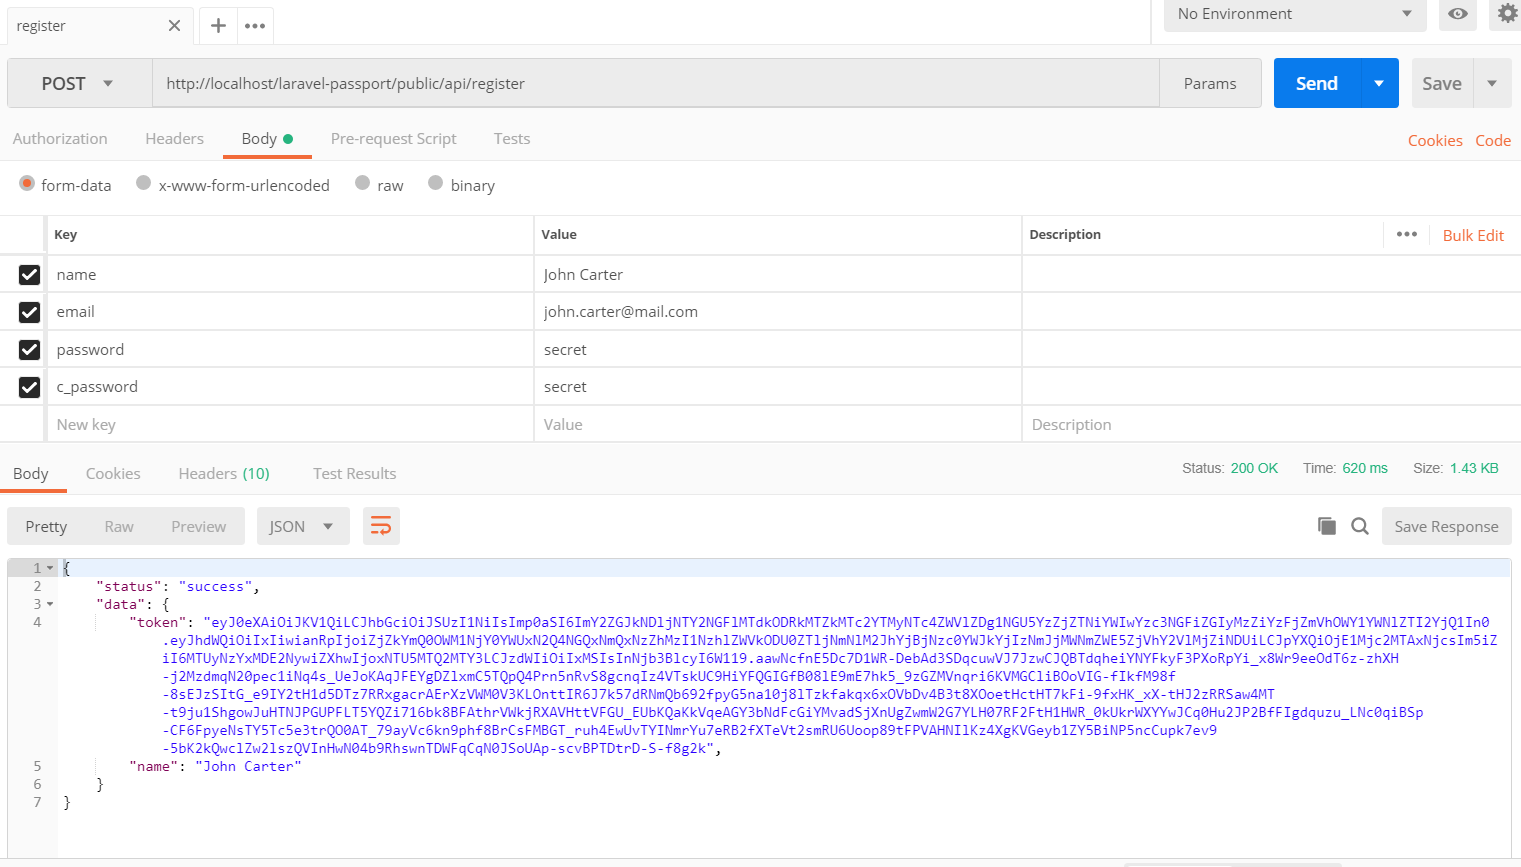
Register API
Register API needs a name, email, password, and c_password. c_password is used to verify the password. And also some of the default Laravel validations implemented such as required, email and confirmation password. After successful registration API returns a token and registered a username.
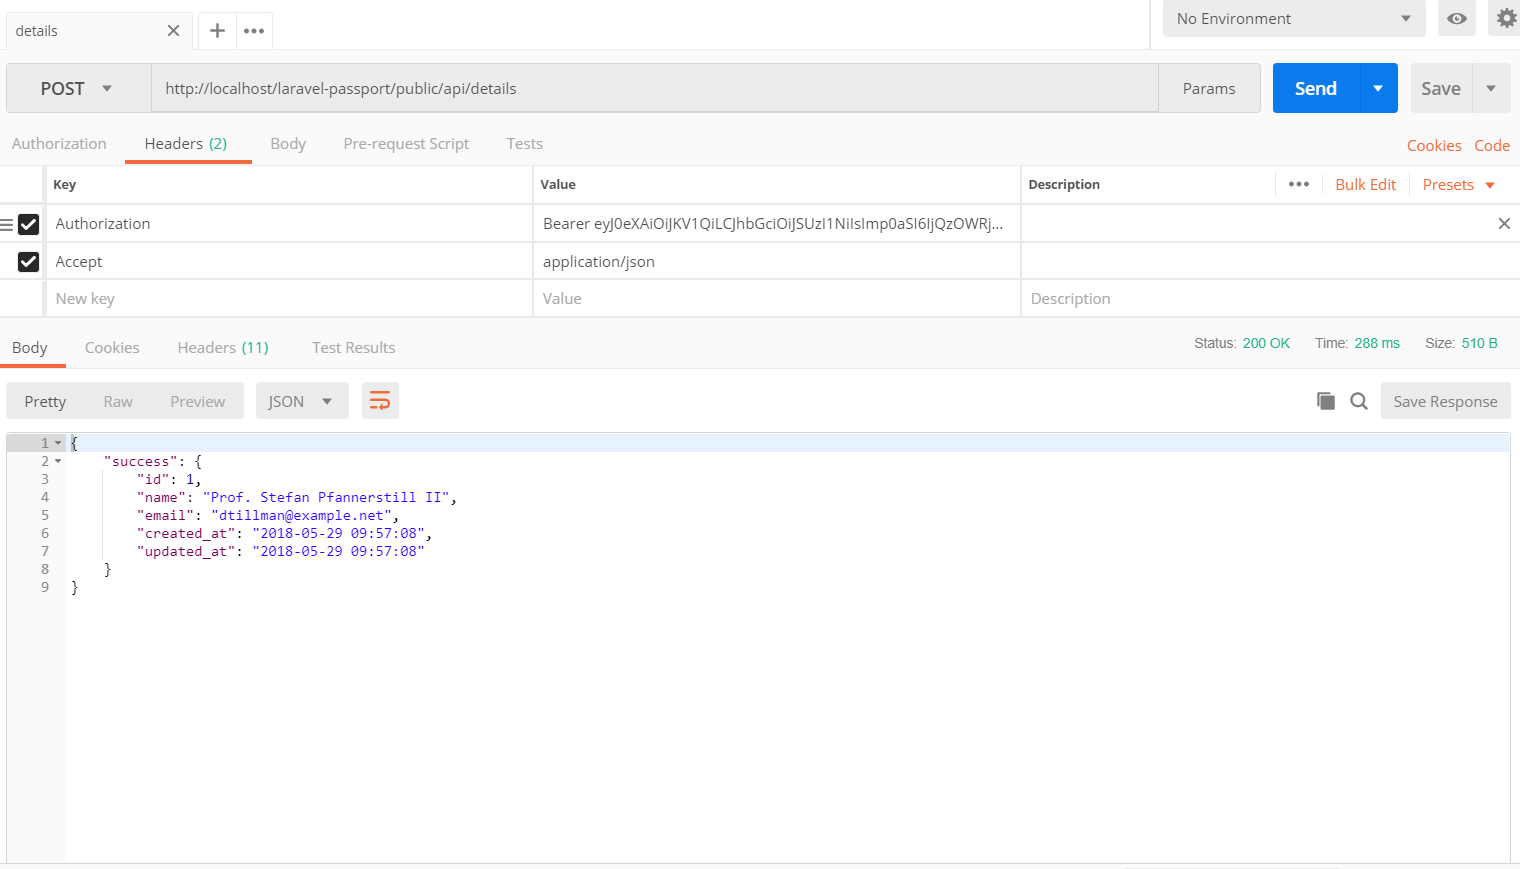
Get Details API
Details API needs two headers Authorization and Accept. After the successful token authentication, API returns the user details.
Conclusion
In this article, we will discuss Laravel API Authentication Passport Implementation. Hope you like this article. You can download the working example from the GitHub. Please feel free to add the comments if any query or submit your feedback 🙂
If you like our content, please consider buying us a coffee.
Thank you for your support!
Buy Me a Coffee
I encounter this error upon login.
“`
Method Illuminate\\Auth\\RequestGuard::attempt does not exist
“`
Do you know what causes the error?
Did you fix the error?
Thanks!!! It works for me!!!! had some trouble with other tutorials, but this one work.
Thanks Swapnil
Please complete your tutorial, include the generating for passport:client –personal and other generating keys. Looking forward to the more awesome article you will post. Thank you!
I have one clarification why client id and client secret is not used in validating the user along username and password
Hi Karthik, It’s a basic example. We will create this in the future article. Or if you can create this then share your code, we will happily add in our website as a guest post.
Hello Code Briefly,
before everything very well contribution.
I have a problem and I have my Api created and I need to consume it from several different domains, example dominio.com and dominio1.com and I get the following error:
Access to XMLHttpRequest at ‘http: //api.grebo.test: 9000 / oauth / token’ from origin ‘http: //grebo.test: 90’ has been blocked by CORS policy: No ‘Access-Control-Allow-Origin ‘header is present on the requested resource.
I hope you can help me.
P.S:
Excuse my spelling, is that I do not speak English 🙂
Hi Grebo,
I will explain this issue in the future article.
You can check https://stackoverflow.com/questions/43565877/no-access-control-allow-origin-header-laravel-5-4